November 9, 2025
The rather polarizing french baton style ski poles have taken ski touring industry by storm and have many advantages. As a cheap* option, you can easily make your own. All you need is a set of basic aluminum resort poles and few bike parts.

*These parts sourced from a bike shop could easily hit $100. I bought my pieces out of china for $25 (aliexpress), I already had some suitable resort poles and powder baskets.
Why the Baton?
Personally I really like the baton style poles for ski touring. They’re fairly light, durable, and perform fantastic for steep skiing and mountaineering. For long traverses I would pick my adjustable poles as they’re more efficient on flats.
While skinning the poles feel very natural to choke up on, this is nice while traversing and skinning in uneven terrain. While booting steep sections of snow these poles plunge upside down very well. This can take the place of an ice axe in soft snow conditions. Lastly they feel very natural to ski steep terrain with. Inspired by Paul Bonhomme I have practiced holding the poles more loosely so upon landing the jump turn you naturally choke up and shorten the pole. This feels very natural and keeps your weight downhill. A traditional full length ski pole often forces hand dragging or holding the pole horizontally, this can make peoples hips closer to the snow, and make skiers lose their edge pressure.
Materials:
- Aluminum Resort Poles
- Powder Baskets (only if poles don’t already have them)
- 2x bicycle handlebar wrap
- Aluminum bar ends
- electrical tape
Steps
- Starting with the old grips. Many grips can be easily slid off the pole after leaving them sitting in boiling water. If this doesn’t work, you can cut off the grip with a sharp knife
- If you have small on-piste baskets, you’ll definitely want to replace those too. If you already have nice powder baskets, skip this step. If your baskets thread on then simply screw the old ones off and new ones on. If they are press fit, it’s easiest to cut off the old baskets (taking care not to cut through the plastic sleeve underneath). Then simply jam on the new baskets.
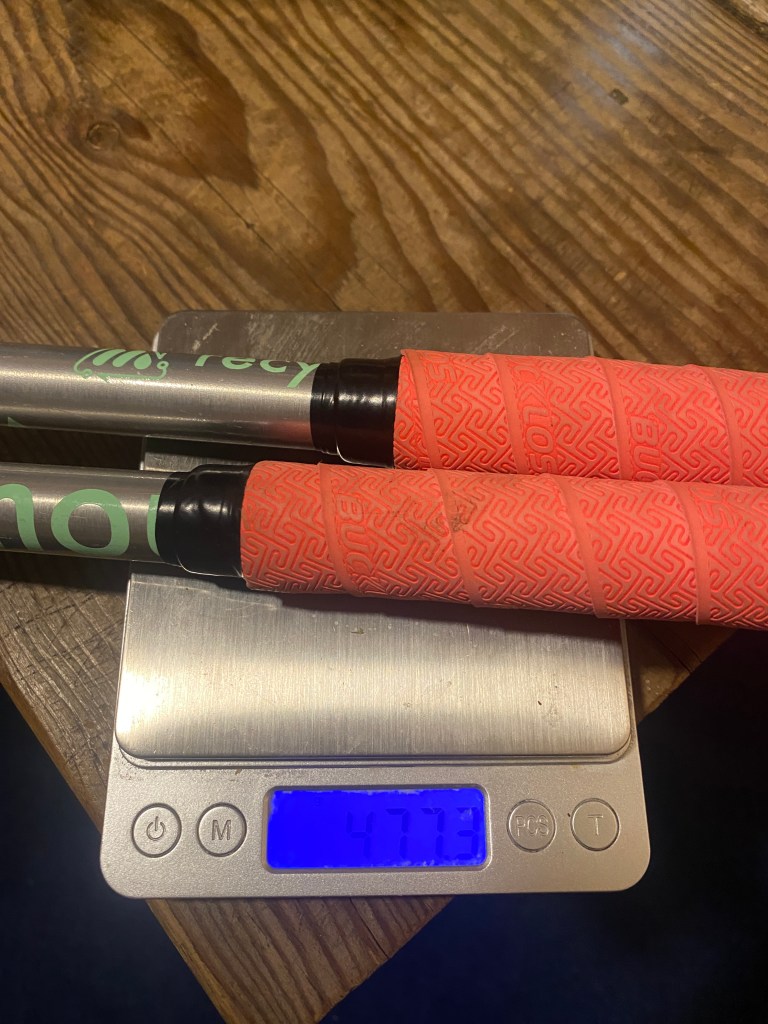
- Starting about 50cm down from the top start wrapping the first layer of bar tape up the pole. 50cm is about the max length for a standard bar wrap. Wrapping from the bottom up, will help prevent the tape from unrolling. Apply the tape pulling with steady even pressure, this should lightly stretch the tape. Stretching the tape is essential for a secure and durable hold. Each wrap should cover 1/3 of the layer before it.
- Finish the ends but cutting the wrap flat, and and putting a few wraps of electrical tape around this.
- Repeat steps 3 & 4 to add a second layer of bar wrap. This double wrap gives a more comfortable thicker grip.
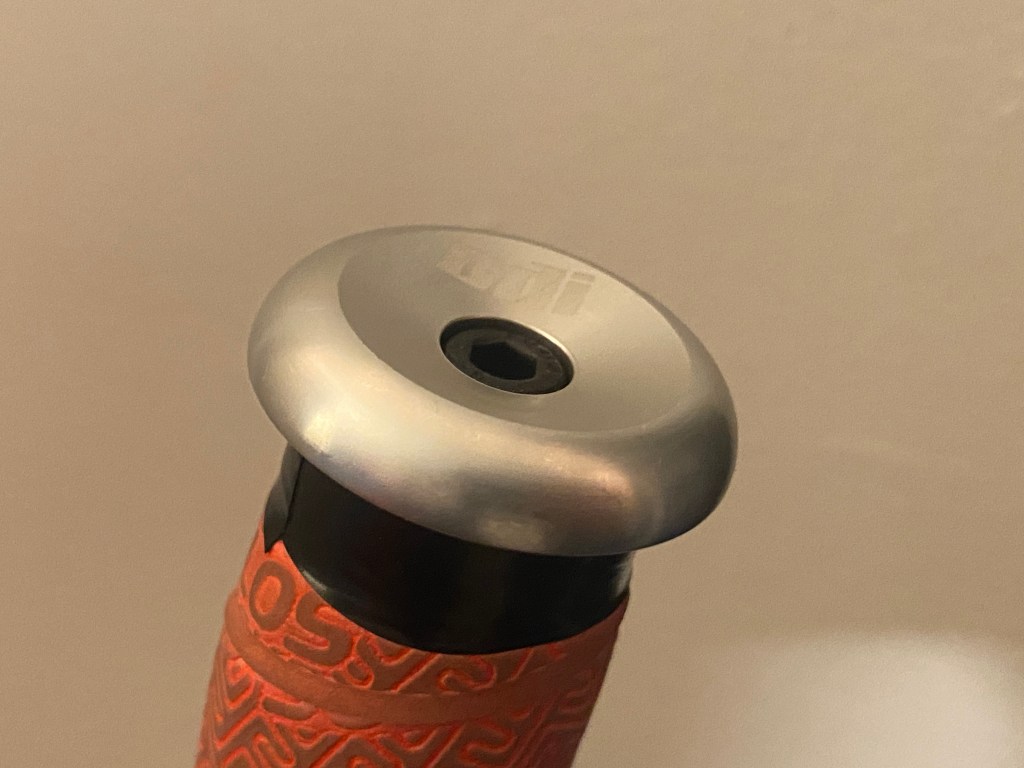
- Push in and tighten aluminum bar end plugs.
Materials Selection
Poles: Try and find some with thicker diameter aluminum tubing. This will make the grip girthier and more comfortable as well as being stronger.
Bar Wrap: The first layer of bar wrap can be something cheap and it doesn’t matter, it’s just for volume. For the outer layer, choose something with closed cell foam, that way it won’t ice up as easily.
Bar Ends: I would highly recommend buying the more expensive ODI bar ends, ($10 on aliexpress). I have tried a few different ones these are by far the best. The 14-18mm range fits most ski poles without modification. The top is rounded and comfortable to palm the top of. And lastly it will give you a little bit of a lip to flick your heel risers with.

Leave a comment