Sept 16, 2024 via Darn Gendarme 5.9
Sharp spires are undoubtably alluring to climbers, small airy summits with technical climbing being the only way to the top. Showcase spire had been on my radar for years, but I could find limited beta on both the climb and techniques in rigging a retrievable Tyrolean to descend off the tower (optional but well worth it). When AJ suggested we give it a go this season, I was all in. I knew having AJ along with his extensive ropes knowledge would help us pull off all the rope rigging smoothly.
Approach
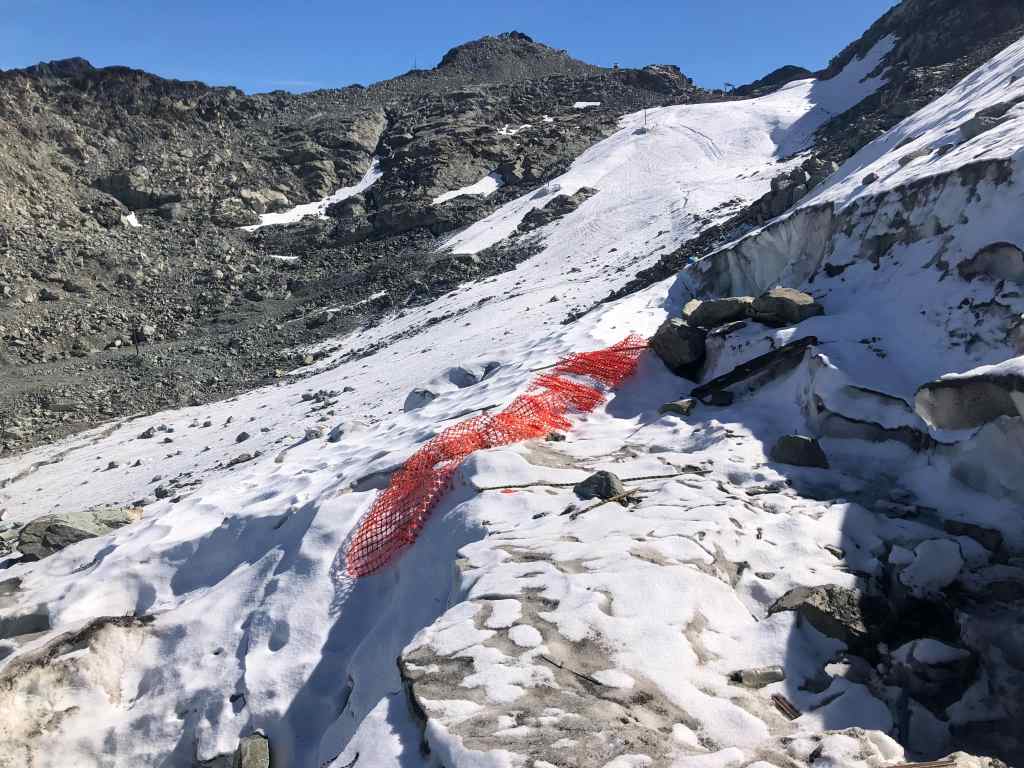
From the top of the gondola the approach took us about 1.5 hours. We walked up the road by the top of 7th Heaven and then down to the Horstman Glacier (crampons were nice to have late in the season). Make your way to the top of the Showcase T-Bar, from here turn climbers left (North) up the ridge. After about 100m the spire will be straight ahead of you.
Climb
Not knowing what to expect, we brought a set of offset nuts and a rack of cams .3-3 with doubles in .4-2. This was for the most part plenty of gear, but I would have liked a couple smaller micro cams to protect the first few moves off the boulder.
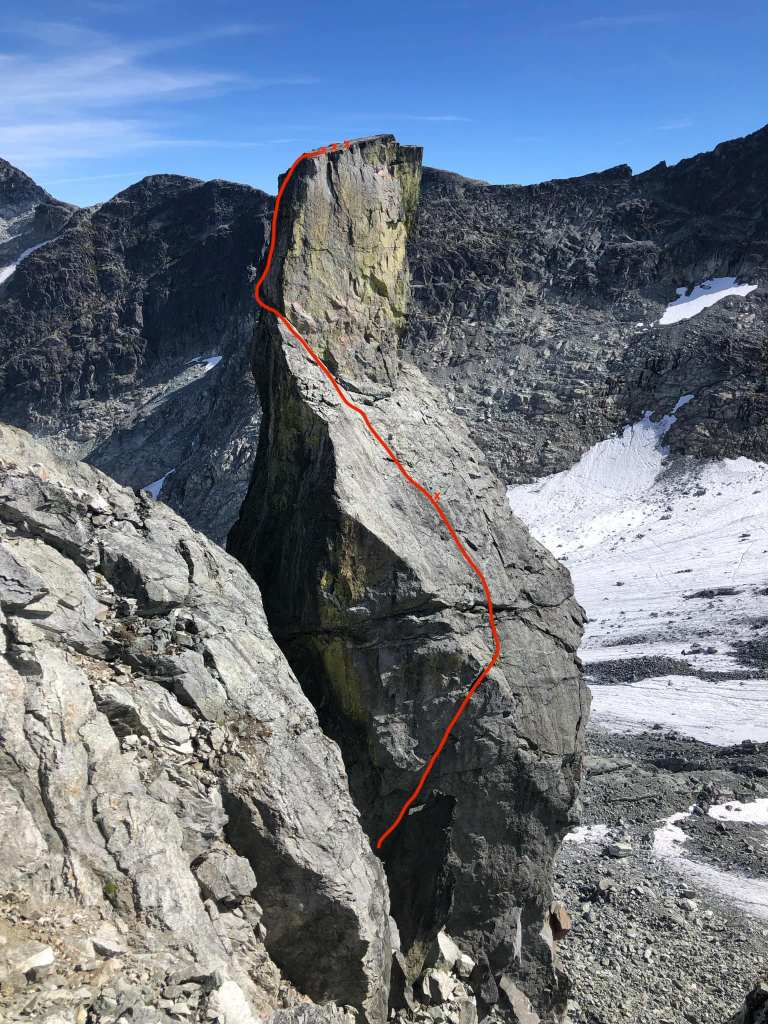
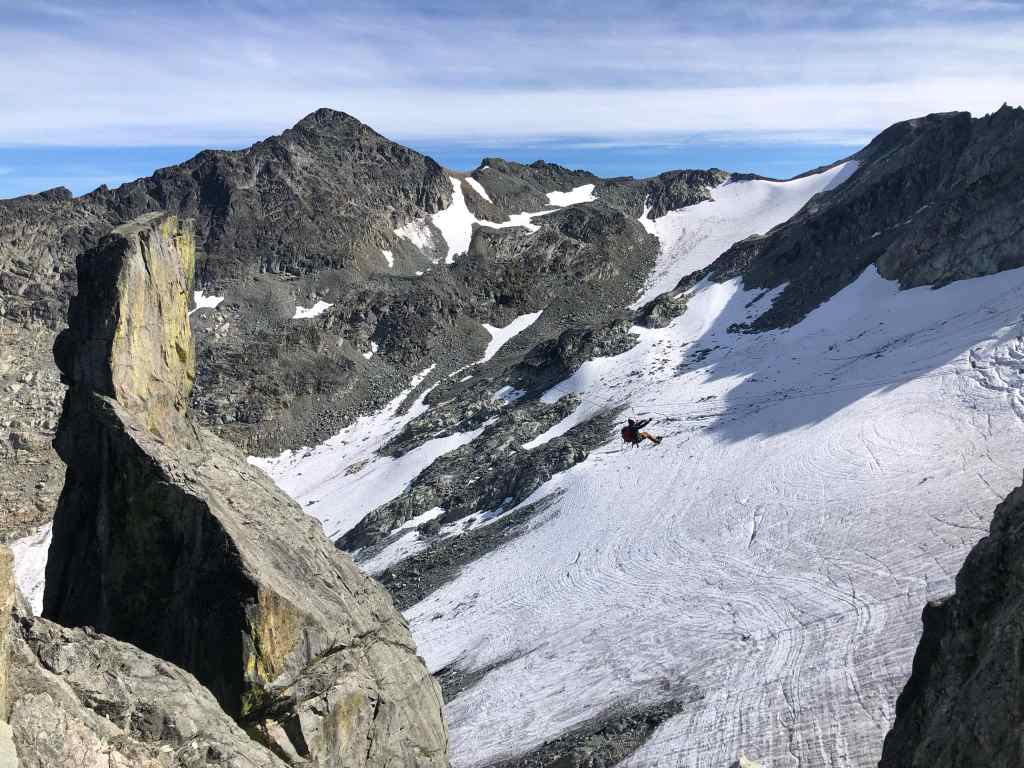
Once you step off the boulder, you are instantly high above the deck, there are good holds but just a couple thin cracks for protection. After a few moves you get some good cams and make your way onto the runout, but easy slab. After the slab you work left around the arete and follow some jugs up, this final section protects better than it looks from far away. Altogether it is about a 40m pitch.
There is also a sport bolted 11c route on the arete climbers right of Darn Gendarme.
Retrievable Tyrolean Rigging
I should preface this by saying I am not a guide/expert in rigging. There are many ways to do this, and many ways one could mess this system up. This is fairly advanced rope work, do so at your own risk.
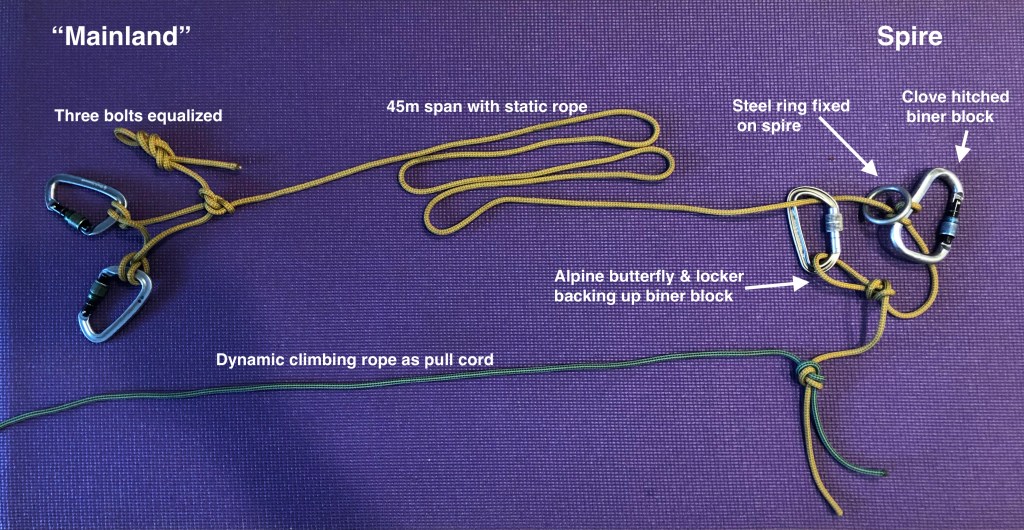
To rappel down we fixed a 50m 11mm static rope (45m would probably be the minimum) to three anchor bolts. We also added a piece of foam sit pad as a rope protector, this is seemed unnecessary with how high the rope sat once tensioned, but may be good if you use stretchy dynamic rope. I would highly recommend using static line if you have it (no skinny glacier cords though). Using dynamic rope will force you to ascend more up the other side, and will also rub more on the rock, getting more easily damaged.
To tag up the static line we attached a 30m rad line to the end for the second to tag up. This seemed like a good combo of lengths. I lead the pitch on a separate 70m dynamic rope. You would want a longer tag line to rig from the sport bolted 11c on the other side.
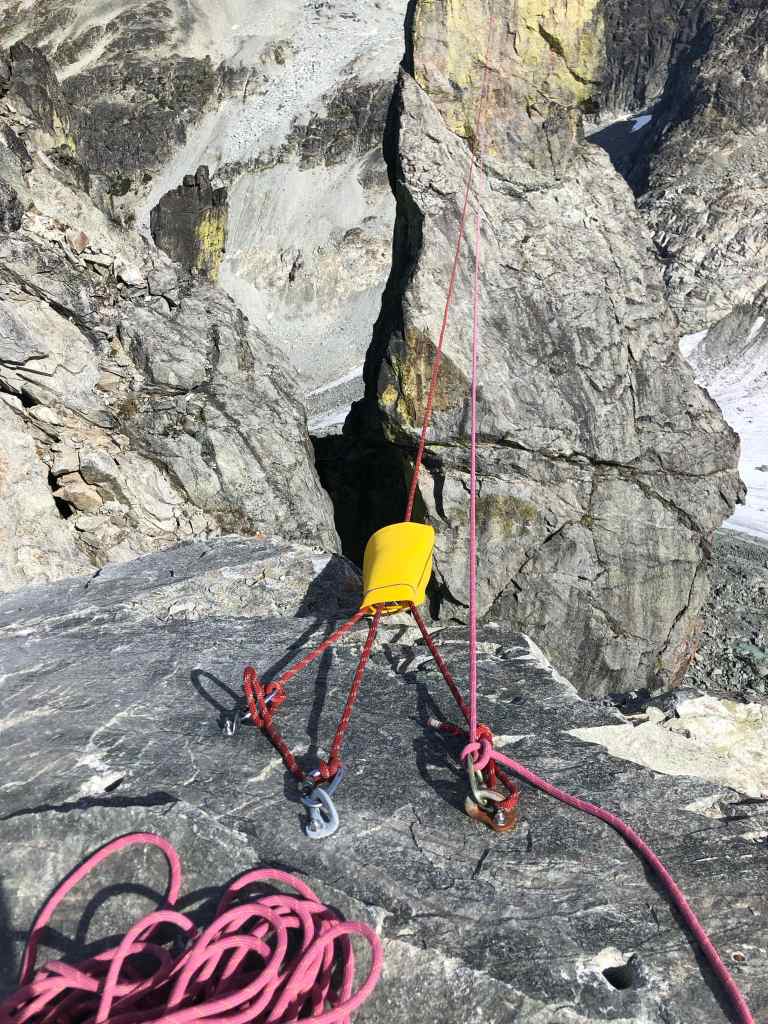
At the top we found a six-piece anchor equalized to a large ring. The anchor was old, and none of the pieces were particularly confidence inspiring (see photo below). It’s worth considering that a Tyrolean puts much higher loads on the anchor than a rappel or top belay. How much higher depends on how much you tension the rope and how stretchy your rope is. After some debate we decided to still rig the Tyrolean off the anchor. Inspect the anchor yourself and make your own decision.

To avoid putting too much strain on the anchor, we decided to only lightly tension the rope. Using a 2:1 pulley system made with a micro traxion, I pulled the rope tight, then tied a clove hitch onto a large pear locker to create a biner block. The carabiner block loads the carabiner somewhat awkwardly with the large ring, so we decided to back it up by tying an alpine butterfly in the tail end and fixing that to the load line with a locking carabiner (similar to a reepshnur rappel). The tail end of the static rope would be our pull side to retrieve it. I attached that rope to our dynamic climbing rope, which the first person would tag across the span.
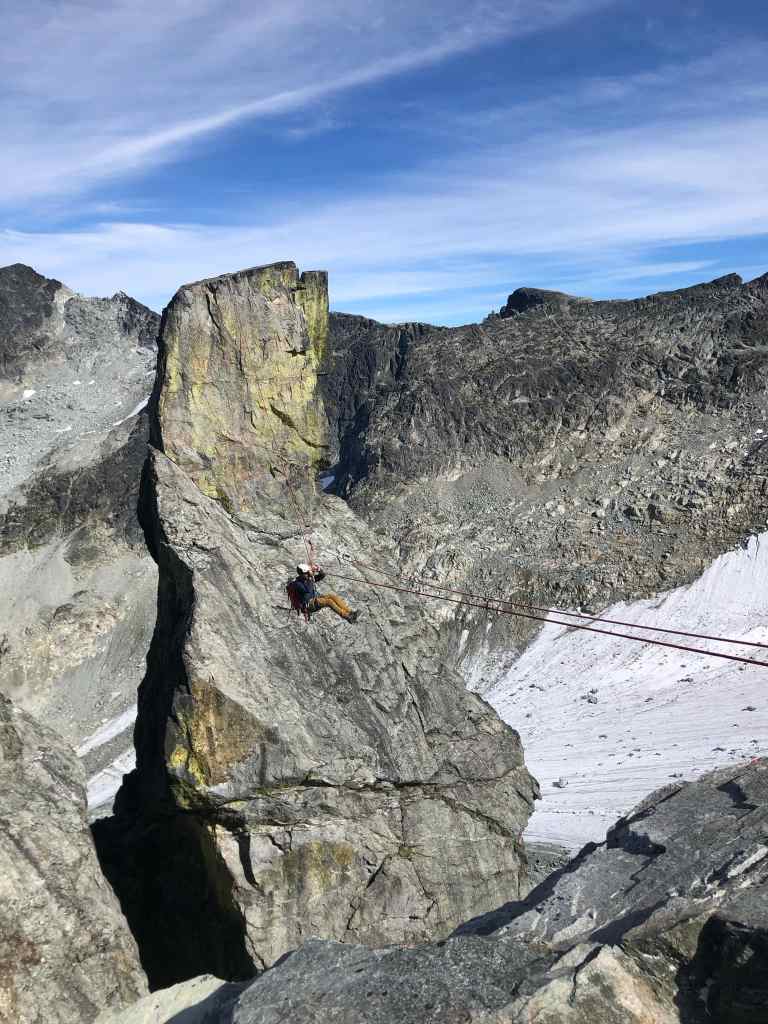
To attach each person to the Tyrolean we used a progress capture pulley (makes ascending up the far side easier than a plain pulley), attached to the harness via a basket hitched 60cm sling. This gives you about 30cm of extension so you can still easily reach the rope. We backed up the pulley with a locking carabiner on a 60cm cm sling. You can control the speed of your descent with either leather gloves or a load releasable friction hitch (schwabisch or VT would be good options). Once you get to the far side you will probably need to ascend a short distance up to the anchors. A prusik and the progress capture pulley you already have on the rope works well for this.
Pull the rope by simply undoing your anchor and pulling the dynamic line. Be careful to ensure all knots are out of the rope. The rope will feel very heavy to hold with its weight across the span, much heavier than if it were vertical. We simply held the rope with a prusik hitch attached to the anchor. This supported the rope so we could easily undo all the knots.
Tyrolean Gear List (additional to climbing kit)
- 45m+ static rope
- 30m+ tag line
- One progress capture pulley each
- Optional rope protector
- Leather gloves
- Extra locking carabiners
This is assuming you are already carrying a prusik, slings, cordalette, etc.

Leave a comment